Showing posts with label paper. Show all posts

Thursday, January 22, 2015

97 Days - Basel Paper Museum (Switzerland)

Basler Papiermuhle (Paper Museum) 
Euro Trip, 2014, Part 1

Today is my first photo project for 100 Days of Me!  We recently got back from Europe and rather than waiting 2-3 years before I get around to actually editing pictures, I thought I'd actually do them in a somewhat reasonable amount of time!

As to not cause my brain to explode trying to edit them all (near 6,000 total shots), I've broken it up into small chunks.  Now you get to experience some of the fun we had traveling in Switzerland and France!  

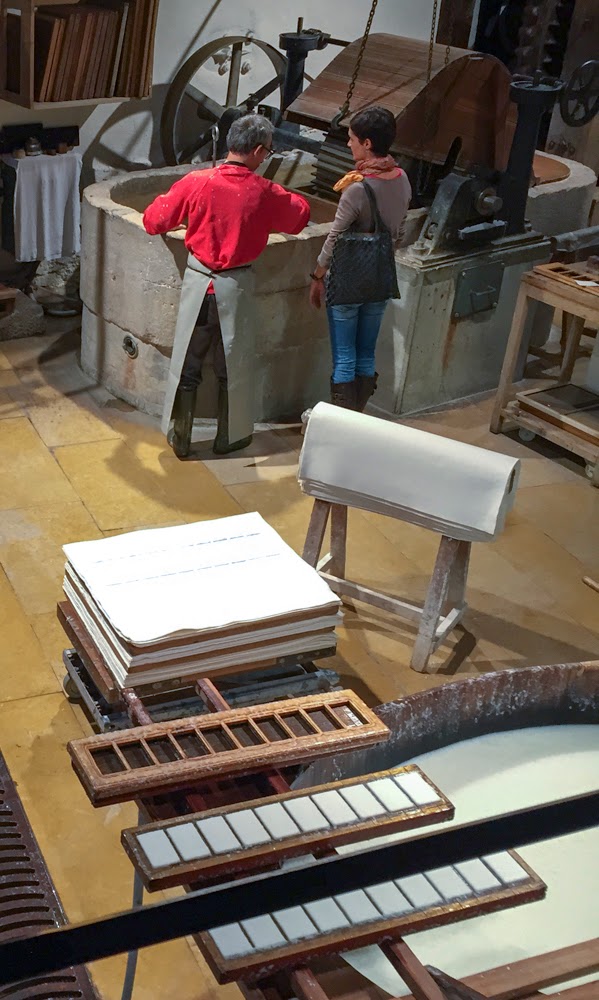
Our first stop is at one of the coolest places we've ever been!  It's the Basler Papiermuhle (the Paper Museum); it's both a paper and printing museum and a working print shop!  They still make paper by hand and use awesome antique printing machines (and techniques, such as marbling paper!).  We spent over two hours running around acting like 7-year-old's at a toy store.  Theresa got to actually make paper, run a small printing press and marble paper!  

If you just happen to be hanging out in Basel, Switzerland, you should absolutely go visit!  

Enjoy!  
(If you prefer to view them on Flickr, you can do so here)


Monday, June 13, 2011

Photo 365 - Day 293 (Pamphlets)

Day 293 (April 22nd, 2011)
Title: Pamphlets

Still in catch-up mode. Honestly, who doesn't love pamphlets?!

Subject: Doubletree Hotel, San Pedro, CA

Techie: 33mm, f/4.0 at 1/60th.

Enjoy!

Saturday, March 5, 2011

Photo 365 - Day 207 (Sparkle)

Day 207 (January 26th, 2011)
Title: Sparkle

Secrets of Scrapbooking: Sparkle!

The most dangerous of all embellishments - Sparkle!  Of course, by "dangerous", I mean is the one embellishment that you need to be careful of using, because overusing it can take away from the overall idea of your project instead of enhancing it.  A sparkle element can be used in just about any aspect of a project (you can add sparkle via ribbon, embellishments, glitter, gel inks with glitter, embossing powders, and so much more), but the real "trick" is to use just enough sparkle to enhance the theme of your project, and not look like a disco-ball (unless, of course, your theme is 'Disco Ball'). 

Sparkle elements remind me of a product they used to sell years ago called the "BeDazzler" - it was basically a stapler for rhinestones.  You could attached rhinestones to just about anything; fabric, shirts, pants, the wall, the cat, anything.  In the commercial for the BeDazzler, you would see these kids using it to add approximately 2.8 trillion rhinestones on to a pair of pants before wearing them outside and causing traffic accidents (okay, they didn't cause accidents - but the pants sure looked like an accident).  This is one of those examples, where a little sparkle would have gone a lone way.

In these project, a sparkly butterfly was attached to a birthday card.  The butterfly had glitter and two rhinestones on it to add a great sparkle element.  Even the metal antennae add a somewhat sparkly feel as well (although its more of a metallic element than a sparkly one). 

I hope you enjoyed this weeks "Secrets of Scrapbooking", and I'm sure I'll do some more scrap-focused weeks in the future! 


Enjoy


 Card by: Theresa A. of Our Results My Vary

Photo 365 - Day 206 (Ink and Stamps)

Day 206 (January 25th, 2011)
Title: Ink and Stamps

Secrets of Scrapbooking: Ink and Stamps!

Inks and Stamps are probably the most customizable element of your project.  While their might be 100's of different papers and 1000's of ribbons, how you draw, stamp and/or color something is limitless.  While you might use the same stamp as someone else, you can use a different ink, you can stamp it with different pressure (therefor having the line density be different), and you can colorize the picture.  All of these factors your control to customize it to your hearts content!  Included when defining "Ink", is of course, one of the most essential elements of any project - the words!  A "Thank You" card is a lot less thankful without those words! 

Just remember, the pen (and ink, and stamps) is your friend! 

Enjoy


 Card by: Theresa A. of Our Results My Vary

Friday, March 4, 2011

Photo 365 - Day 205 (Ribbon Bow)

Day 205 (January 24th, 2011)
Title: Ribbon Bow

Secrets of Scrapbooking: Ribbon, Part 2

Yesterday I showed an example of how ribbon can be used to add color, texture and shine to your project.  Today, I'm doing one more ribbon photo, to show how it can also add the element of depth.  In this example, a thin red ribbon has been used twice, first as a flat element (again, adding color, texture and shine) as well as a folded bow to add more depth to the project.  The bow (or any other 3D-shaped ribbon) adds even more shine than the flat ribbon, because it offers more surface area for light to reflect off it.

Who would have thought you could get so much impact out of just a small piece of ribbon!

Enjoy

 Card by: Theresa A. of Our Results My Vary

Photo 365 - Day 204 (Ribbon)

Day 204 (January 23rd, 2011)
Title: Ribbon

Secrets of Scrapbooking: Ribbon!

For today's secret of scrapbooking, we are looking at ribbon!  Ribbon is a very inexpensive embellishment (you can get a whole roll for around $1-3) that can be easily added to most projects with just a little glue.  It is very versatile, in that is can perform a lot of roles.  First, it adds a great slash of color and you can get ribbon in just about any color known.  Second, it adds texture to the project, you can get ribbon with many different textures, like silk, satin, cotton and more.  Third, ribbon can add more depth to the project, depending on how it is used (see tomorrow for an example ribbon used for depth).  Lastly, ribbon can add sparkle (or shine) to your project.  Many ribbons include metallic threads and other "ingredients" that add more sparkle and almost a "glitter-y" look. 

In this example, we see two ribbons stacked to add color, texture and a nice shine (there is a little depth added, but not too much) to this project.  Paper could have been used in a similar manner, but much of the unique texture and shine that the ribbon brings would have been lost. 

Enjoy

 Card by: Theresa A. of Our Results My Vary

Wednesday, March 2, 2011

Photo 365 - Day 203 (Grommet Flower)

Day 203 (January 22nd, 2011)
Title: Grommet Flower


Secrets of Scrapbooking: Grommets! 


Today's Secret of Scrapbooking is grommets!  Grommets are very similar to yesterday's secret, brads - but with some key differences.  First, a grommet is more permanent, whereas brads are removable.  A grommet is a small metal tube with one end rounded (or "curled") to be smooth and the other end left unaltered.  First, a hole is punched between one or more layers to be linked together and then the grommet is inserted into the hole of each item.  A special crimping tool is used (most notable, the Cropadile!) and the unaltered end is curled (squished) until it is rounded like the top - and in doing so the layers are permanently linked. 


As with the brads, the grommets add both a color and depth element, but at the same time they can be used as a junction for other embellishments, like ribbon, cloth, string, and brads! 


In this photo, we see that a grommet was used to connect two different flower cut-outs to a base of white cardstock (after holes were punched in them).  One thing to note is the bottom layer (not connected to the flowers), a page from a book, can be seen via the grommet holes. 


Enjoy


 Card by: Theresa A. of Our Results My Vary

Friday, February 18, 2011

Photo 365 - Day 179 (Paper Hearts)

Day 179 (December 29th, 2010)
Title: Paper Hearts

I'm not what one would call "creative" when it comes to scrapbooking.  There is a reason my preferred art is photography, mostly because I don't have to create something out of nothing.  With scrapbooking, as with arts such as painting and sculpting, the results are completely from the mind of the artist (aka, Scrapper).  But, with photography we are usually just manipulating some source material (the photo) until we create a object that we want to display.  If I want to show someone a bird, I go find a bird, take a picture of it, perhaps edit it a bit and, BAM - a picture of a bird.  But, for a Scrapper, they get pens and paper and die-cuts and punches and machines and rulers and tape and glue and stamps and, BAM - You have a 27 page journal on the entire life and history of a sparrows.  So, as you can see, slightly different.

But, while I've got as much creativity as a gnat when it comes to scrapping, I do love using the die-cuts and punching out a zillion little things that will never in fact never be used and instead end up embedded into the floor for 20 years.  Weee! 

Enjoy